
Free Crochet Pattern Quick Mini Mitten Garland
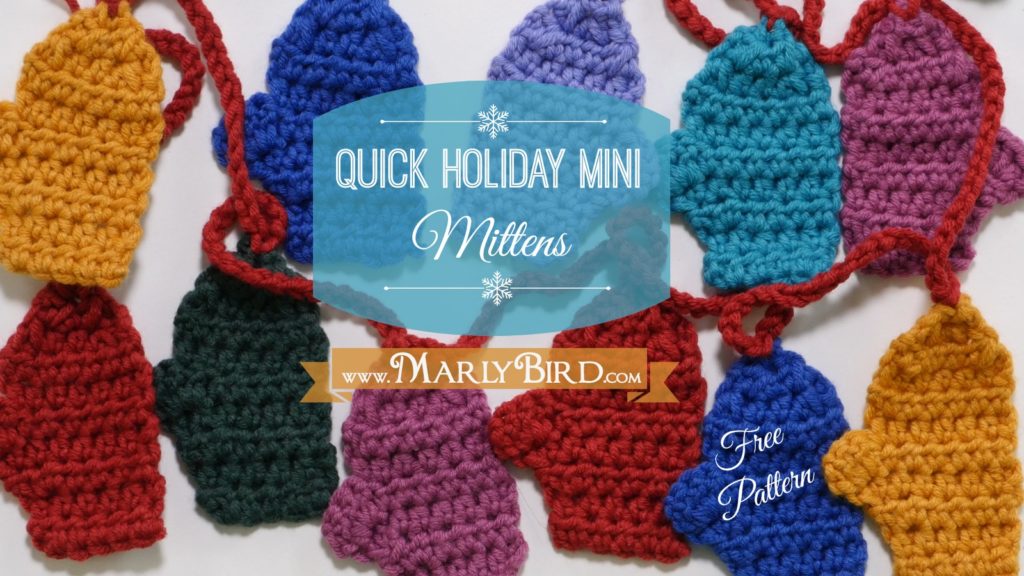
The Quick Mini Mitten Garland is a free crochet pattern by Marly Bird using less than 100 yards of any smooth yarn per color. Work tiny mittens in half double crochet, weave in your ends, then slip stitch them together on a chain — the perfect quick holiday make for your mantel, tree, or gift wrapping. A YouTube tutorial is included! 🧤
⚡ Quick Answer: How long does a mini mitten garland take to crochet?
Each mini mitten takes about 15–20 minutes — so a garland of 12 mittens in 6 holiday colors can be finished in a single afternoon sitting. Make all the mittens first (assembly-line style!), weave in your ends as you go, then string them together. Satisfying, fast, and practically free from your yarn stash. 🎄
Okay, real talk? This is one of those patterns that I almost didn't write down because I was making these little mittens at the kitchen table, not at my design desk. They're THAT casual. That quick. That satisfying.
But then people started asking… and asking… and here we are. The Quick Mini Mitten Garland has been hanging in my studio for years, and every single person who sees it asks how to make it. Now you can! 🎉
Using less than 100 yards per color (yes, really — check your scrap bin!), these tiny mittens work up so fast you'll have a full garland done before the next episode of whatever you're bingeing. I even made a YouTube video with all my tips and tricks to help you get the perfect result. 🧶
Affiliate Disclosure: This post contains affiliate links. If you purchase through them I may earn a small commission at no extra cost to you — it helps keep free patterns like this one coming! 🧶 Full disclosure policy.
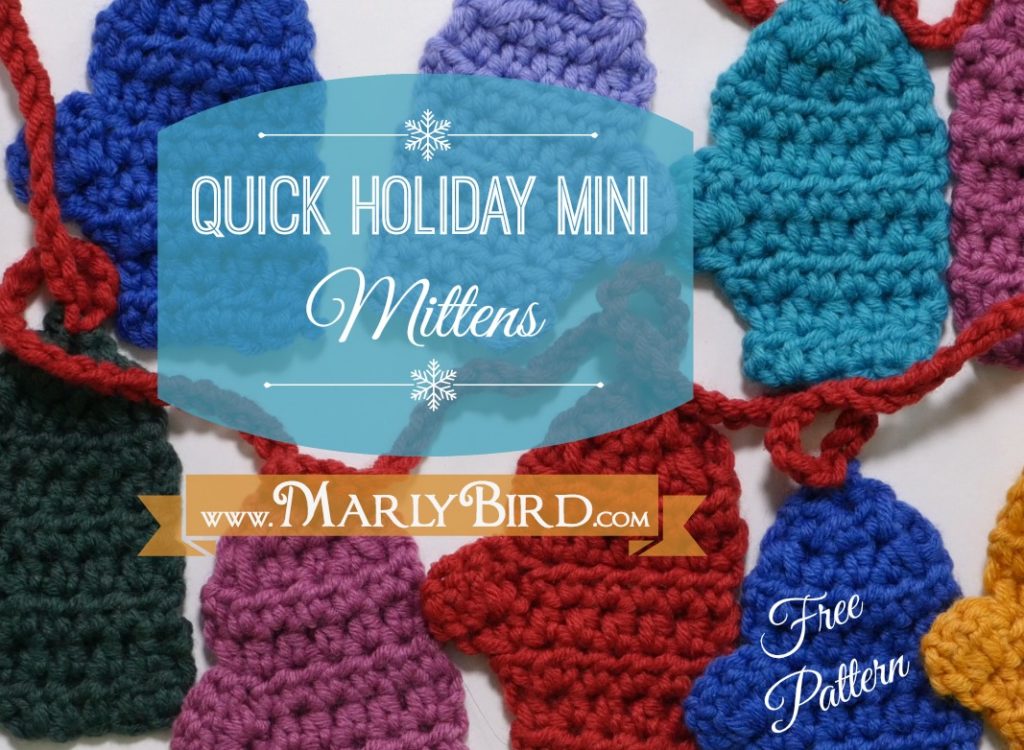
Quick Mini Mitten Garland
Pattern Details
Measurements
Sample Approx: 3½″ tall × 1¾″ wide
Gauge
5 sts = 1¾″ in half double crochet. Gauge is not vital for this project — just have fun with it! Want to geek out on gauge anyway? Here's my full crochet gauge swatch tutorial. 🤓
Yarn
Here's the beautiful truth about this garland: any smooth yarn works! Each mitten uses so little that you can raid your scrap bin and make every single mitten a different color. Here are some favorites:
- Brown Sheep “Nature Spun Worsted” (100% wool, 245 yds/100g) — a classic. The stitch definition is *chef's kiss*.
- Cascade “220 Superwash Sport” (100% superwash merino wool, 136.7 yds/50g) — machine washable and the colors are gorgeous.
- Cascade “Ultra Pima” (100% pima cotton, 220 yds/100g) — the shimmer gives these mittens such a sophisticated look!
- Lion Brand “Wool-Ease” (80% acrylic, 20% wool, 197 yds/85g) — the ultimate workhorse yarn and it comes in SO many holiday colorways.
- Lion Brand “Amazing Yarn” (53% wool, 47% acrylic, 147 yds/50g) — the long color changes mean every mitten looks totally different even within one color. Mind blown. 🤯
Hook
Use whatever hook gets you the mitten size you want — that's the beauty of gauge-optional projects! For the sample, I used an H/8 (5mm). A smaller hook = smaller, more delicate mittens. A larger hook = chunky, cozy-looking mittens. Both are adorable.
Notions
- Tapestry needle (for weaving ends — do this as you go, trust me!)
- Removable stitch markers (optional but helpful)
Stitches Used (with video links!)
- Chain Stitch (ch)
- Half Double Crochet (hdc)
- Double Crochet (dc)
- Slip Stitch (sl st)
✨ Designer Tips: Before You Start the Mitten Garland
Tip 1 — Go full scrappy rainbow: Each mini mitten uses only about 5–8 yards. This is your moment to crack open every partial skein in your stash and make each mitten a different color. A 12-mitten rainbow garland uses less yarn than one dishcloth.
Tip 2 — Assembly line all the way: Don't crochet one mitten and immediately string it up. Make ALL your mittens first — then connect them. It's dramatically faster and keeps your tension consistent on the connecting chain.
Tip 3 — Weave your ends while each mitten is still small: The pattern tells you this, and I'm telling you again because it's THAT important. Weaving ends on a finished, assembled garland is a patience-tester. Weave as you go. Your future self will write you a thank-you note.
Tip 4 — Control your spacing: Short chains between mittens (3–5 chains) give you a compact bunting look. Longer chains (10–15 chains) give you an elegant, draped garland. Both are beautiful — just decide your look before you start connecting!
Tip 5 — Think beyond the garland: These tiny mittens have SO many second lives. Tie one on a gift box as a tag. Add a loop and hang it as an ornament. String 3 on a piece of twine for a stocking stuffer. Make a handful and clip them to holiday cards. Once you start, you won't stop. 🎁
Pattern
Make as many mini mitten motifs as you want in as many colors as you want. That's the whole beautiful point. 😄
Ch 7, hdc in 3rd ch from hook, and in each hdc to end, turn — 5 hdc.
The turning chain does NOT count as a stitch throughout this pattern.
Row 1: Ch 2, hdc in each hdc to end, turn.
Row 2: Ch 2, 2 hdc in first hdc, hdc in each hdc to end, turn — 6 hdc.
Row 3: Ch 2, hdc in each hdc to last hdc, 2 hdc in last hdc, turn — 7 hdc.
Row 4: Ch 3, 3 dc in first hdc, hdc in each hdc to end, turn — 3 dc, 6 hdc. (This forms the thumb!)
Row 5: Ch 2, hdc in each hdc to end, turn, leaving the dc's unworked — 6 hdc.
Row 6: Ch 2, hdc 2 tog, 2 hdc, hdc 2 tog, turn — 4 hdc.
Row 7: Ch 2, hdc 2tog, hdc 2tog, turn — 2 hdc.
Row 8: Ch 2, hdc 2tog. Finish off.
💡 Weave in your ends right now — before you pick up the next color. I know you want to power through, but this is one of those times where stopping for 30 seconds saves you 30 minutes later.
Connecting the Mini Mittens
Once all your mittens are made and ends are woven in, it's time for the most satisfying part! Begin by chaining several chains — this is the space between each mitten (see Tip 4 above for spacing ideas). When you're ready to add a mitten, work a slip stitch join into the last stitch of the mitten, then carry on chaining. Keep going until your garland is as long as you'd like!
And that is truly it. These mini mittens would also be adorable added as decoration to a gift, hung as individual ornaments on the tree, or clipped to holiday cards for a handmade touch. The possibilities are endless. 🎁
Watch the full step-by-step tutorial below — I walk through every row with tips and tricks:
🧶 Add Sweet Nothings to your Ravelry favorites! · Browse all Marly Bird designs on Ravelry
Want More Quick Holiday Crochet Like This? 📧
My newsletter is packed with free patterns, video tutorials, and seasonal inspiration — new content every week. Join thousands of BiCrafty makers who never miss a pattern!
More Christmas Crochet Projects You'll Love 🎄
If you're on a holiday crochet roll, here are a few more quick-and-satisfying Christmas projects from MarlyBird.com:
- 20+ Free Christmas Crochet Garland Patterns — if you loved this one, you'll want to bookmark this whole roundup!
- 30 Free Mini Christmas Ornament Patterns — these mini mittens would look adorable hung individually as tree ornaments too!
- Merry Mischief Free Crochet Hat Ornament — another quick holiday make that's pure charm on a hook!
- 15+ Handmade Holiday Décor Patterns — even more ways to deck the halls with yarn!
- Festive Mini Crochet Wreaths & Christmas Trees — perfect companions to a mitten garland!
Frequently Asked Questions
How much yarn do I need for this garland?
So here's the thing… each mini mitten uses only about 5–8 yards, which means a full garland of 12 mittens uses less than 100 yards total (or less than 100 yards per color if you're going scrappy). It's the ultimate stash-buster. Dig through all those lonely partial skeins and make something magical! ✨
How long does it take to crochet this garland?
Each mitten takes about 15–20 minutes, so a 12-mitten garland is an afternoon project. Use the assembly-line method (all mittens first, then connect!) and you'll be done even faster. This is 100% a one-day-before-company-arrives project. Not that I've ever been in that situation. 😅
Can I use any yarn for this pattern?
Yes! Any smooth yarn works beautifully. Avoid fuzzy or textured yarn (like boucle or eyelash yarn) — the mitten shape won't read clearly in those textures. Worsted weight gives the fastest finish; fingering weight makes delicate mini mittens with even more detail. Both are adorable!
Is there a video tutorial for this pattern?
Yes! I made a YouTube video walking through the whole process with tips and tricks. It's embedded right in this post — just scroll up to find it!
Can I sell items I make from this pattern?
Absolutely — items made for sale from this pattern are totally permitted! Just please don't reprint or repost the pattern itself. Sharing the link to this page? Always appreciated. 💛
Is there an ad-free PDF version of this pattern?
Not yet! This pattern is currently available as a free blog post only. Join the newsletter to be the first to know if a PDF version becomes available — I always tell my insiders first!
Originally published December 2014. Updated August 2026 with expanded tips, refreshed yarn links, and full framework treatment.
Written pattern copyright Marly Bird Designs, a division of Yarnsports LLC © 2014. Please do not reprint or repost this pattern — sharing the link to this page is always appreciated! Items made for sale from this pattern are permitted.
Categories: Crochet, Our Free Patterns, Pattern, Uncategorized, YouTube Video Tutorial



Hi Marly! Thanks so much for this awesome tutorial video! I just wanted to say that I think you are missing a row in the written directions. In the video, you do 6 hdc after the row with the thumb. That’s not in the written directions and it definitely looks better with that extra row in there. Thanks again!
Thank you do much for sharing your talent. I just love thesr